
Use Searchie's automation feature to better your business
Whether you're meeting with the same client(s) consistently, hosting weekly group calls, or simply wanting to improve the consumption, retention, and review process of all the digital meetings you're involved in, there are some specific techniques and approaches in Searchie that will set you up for success.
🧰 What You Will Need
-
Some coaching clients!
-
A Searchie account
Step 1 - Prepare your account
To make the most of your Searchie subscription, you'll need to do some organizing and preparing in advance of adding your call recordings to your media library.
The first thing you should do is configure your Custom Vocabulary with the names, brands, and other niche-specific words used in your business and/or on your calls. You can find it in Profile > Settings > Transcripts.

This feature will improve the accuracy of your transcripts and help your clients find what they are looking for faster.
The next step is to turn your attention towards the structure of your folders in Searchie. The folder system is key to unlocking the potential of the automation you can achieve with the platform. The reason for this is that with the proper organization at the folder level, we can create playlists and widgets that will automatically update as new content is added to particular folders. Check out this guide on automating playlists and this one on building widgets for more info.
You should have a separate folder for each of the following that you have in your business:
-
Individual clients (i.e. A folder for "Will's calls", "Jake's calls", etc.)
-
Groups that meet consistently. (i.e. "Monday sessions", "Accountability group", etc.)
- Any other audience that receives content/information from you continuously (i.e. FB Groups, a team of VAs, etc.)
Step 2 - Upload your content
You can follow this article for help uploading content into Searchie. Upload into the corresponding folders for each of your recordings, or move media into the correct folder after uploading.
Step 3 - Build your Playlists, Widgets, and automation
Here is where the power of Searchie comes to light for those clients you've been meeting with for some time now. By building a playlist for each of the folders created in the above step, we can now start to automate some of the delivery and consumption of the call replays you've previously been emailing out or posting on FB after the conclusion of the meeting.
Head into the Setting icon of the playlist and attach the respective Folder to automate content.


What we've done by using the Folders dropdown in the Automation option is create a Playlist that is directly linked to the structure of a particular folder. This guide linked earlier in the article will explain the process completely.
You can also use this method to create Widgets for your audience. These widgets will be organized based on the criteria we used to structure the folders in our account.
Step 4 - Share your content and keep creating
Now that you've organized things in Searchie, it's time we share the wealth with your audience and keep this train rollin'!
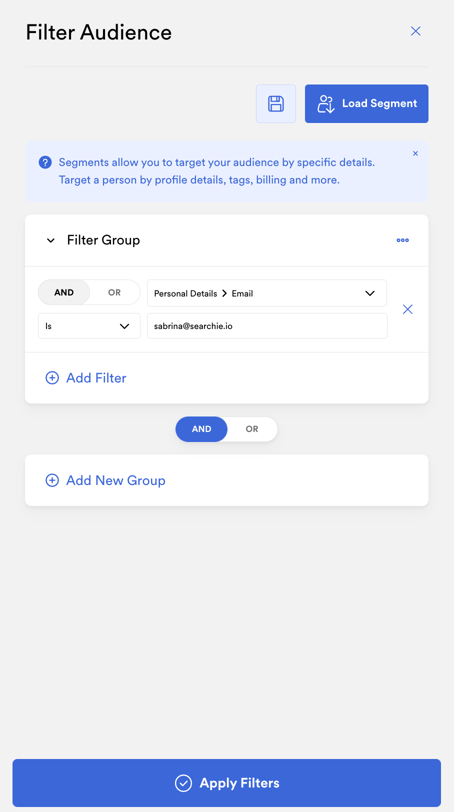
To add 1-on-1 coaching calls into your Searchie Hub, create an Audience Segment where Personal Details is your client's email. Then, add the Playlist with your client's coaching calls into a Hub Section and attach the Segment you created. This will ensure that only your client will be able to see their coaching calls inside your Searchie Hub.
📚 Up Next
-
Build a private coaching Hub
-
Import people into your Audience