
Audience Segments will help you control and organize your Audience
🧰 What You Will Need
-
A Searchie account
-
Searchie Audience members
Step 1 - Create a new Audience Segment
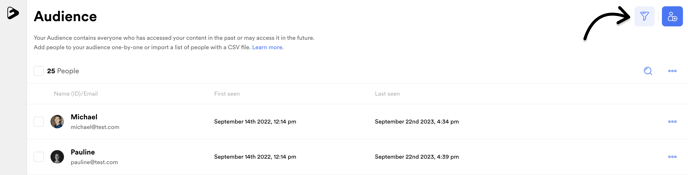
Head to the Audiences tab inside of your Searchie account. Click on the Funnel icon to open the audience filter and segment menu.
Step 2 - Select Audience Segment conditions
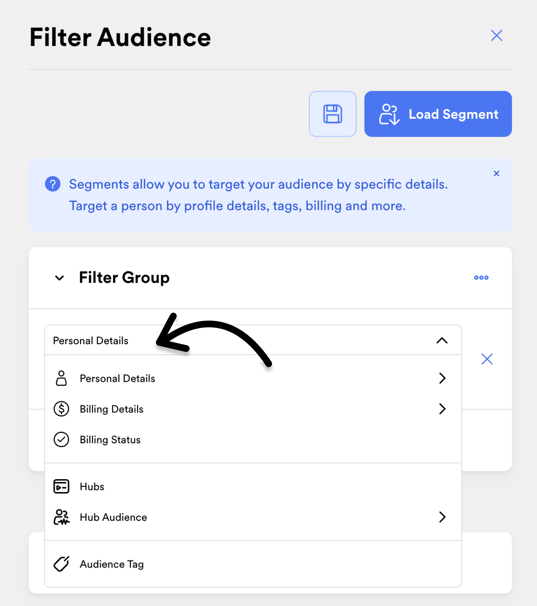
Use the Filter Group dropdown menu to narrow your audience list based on specific filters and conditions.
Audience Segments have several conditions to choose from to organize your Audience. They include: Personal details, Billing details, Billing status, Hubs, Hub Activity and (Audience) Tags.
- Personal details - Allows you to segment your Audience by name, email, or date joined, including custom dates. This could be through an invite or via the Native Registration.
- Billing details - Allows you to segment your Audience by the products and plans they've purchased through Searchie Payments
- Billing status - Allows you to segment your Audience by their billing status if they've purchased access to a Hub with Searchie Payments.
- Hubs - Segment your Audience by the Hub(s) they have access to.
- Hub Audience - Segment your Audience based on Hub Registration Date, Content Consumption and Number of Searches.
- Audience Tag - Segment your Audience by the Audience Tags applied to their profile.
There is no limit to the conditions you can select, but you need at least ONE condition for the Segment to function.
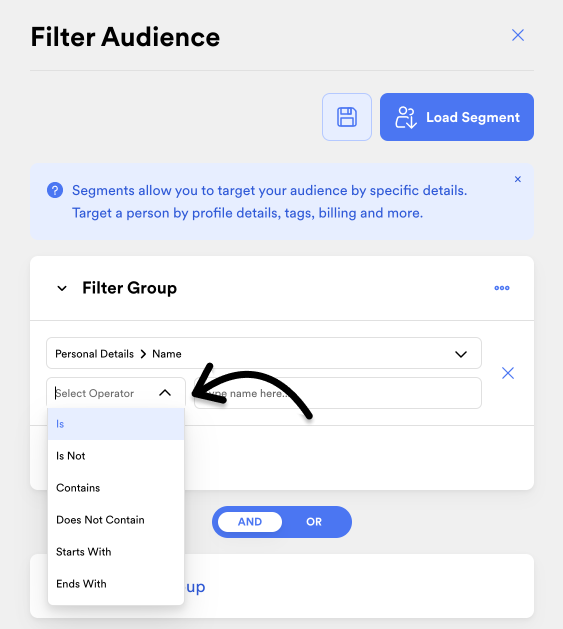
Step 3 - Select Operators
Once you choose a condition to Segment your Audience, select the Operator for that condition before filling in the next field. This allows us to sort your audience using criteria such as; the presence or absence of an Audience Tag.
Step 4 - Finalize your Segment
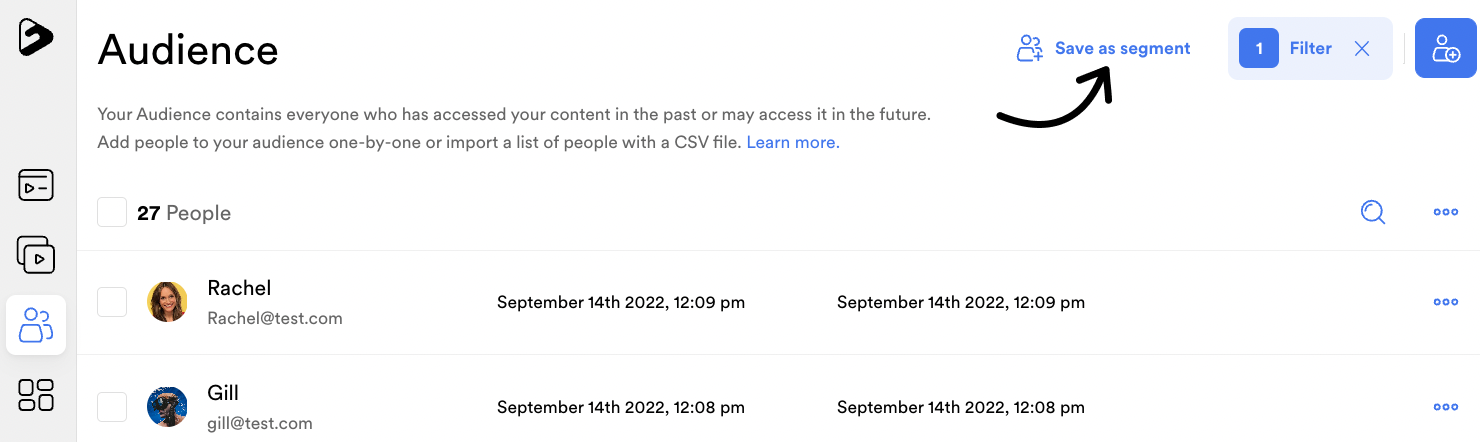
Once you've set the conditions for grouping your Audience, click Apply Filters to preview your Segment and confirm that it's working right.
After clicking Apply Filters you will see the changes reflected in your Audience list, you can save your new Segment by clicking Save as segment.
Step 5 - Making changes to your Segment
If you find that the previewed users aren't the ones you want, simply make your adjustments, and then click Save Segment when you're finished.
You're essentially building out a logic statement 🤓. This statement, along with others in the same filter group, AND/OR other filter groups, will determine if an audience member fits into that particular Segment.
Step 6 - Building on your Audience Segment
To create more complex segments, click the Add New Group button below the initial filter group.
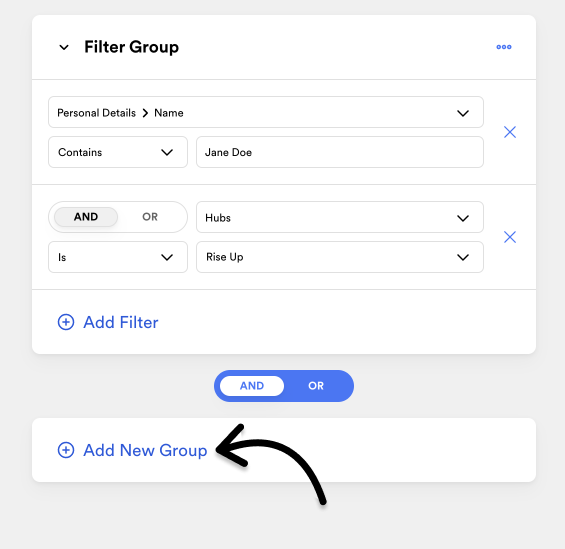
You may add new filters to the current group and swap between the AND/OR conditions. With AND, all conditions must be met but with OR, only one condition needs to be met for an audience member to appear in the segment. Don't forget to hit 💾 Save!
Step 7 - Review the AND/OR Logic Statements
Ensuring your segments are accurate is key to getting the right content in front of the right audience. If you notice that your segment isn't working as expected, it's important to revisit and double-check the AND/OR logic you've used.
You should also check the operators being used, like Is, Is Not, Contains, and so on, as outlined in Step 3. The correct use of these Operators can often resolve segment functionality issues.
If you run into a snag, just give our friendly Support team a shout at help@searchie.io 🙂
📚 Up Next
-
Import people into your Audience
-
Use Audience tags to manage your Audience
-
Drip content using Segments