
Import a list of people with a CSV file to grant them access to an existing or future Searchie Hub
🧰 What You Will Need
-
A CSV file with at least an email column
-
A Searchie account
-
A Searchie Hub
Step 1 - Prepare your CSV file
To get started, you'll need a list of people in a CSV file, containing at least their email addresses. A good way to create this file is by using a spreadsheet and saving it in .csv format. Refer to the image below for guidance.

The supported fields are Email, First Name, Last Name, and Phone Number. Creating your file this way will make it easier to identify the parameters to import later.
Step 2 - Start the Import process on the Audiences page
Navigate to the Audiences tab in your Searchie account and click the Add Person icon > Import Audience.`

In the window that appears, click Upload CSV to upload or drop your CSV file into the uploader. You can also view recent imports from this pop-up.

Step 3 - Configure the Import
Next, the uploader will take you through a multi-step process to configure the details and settings for this import:
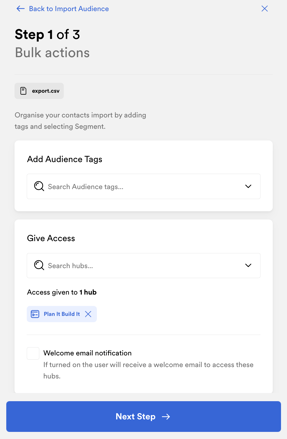
You will first be asked to Add Audience Tags or Give Access to any Hubs for this list of users. You can also toggle on the Welcome email notification to send the Hub Welcome Email to all of the people in this import.
Now, line up the columns in the file with the fields in Searchie. When you're done, it should look something like this.

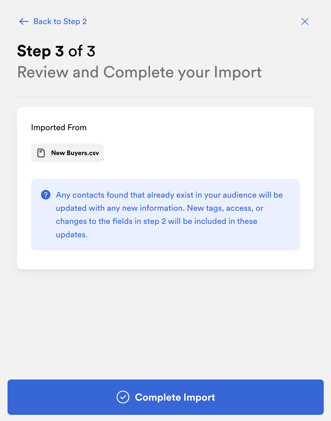
Finally, review and Complete Import to finish the configuration process. Your audience will be updated shortly.
That's it! Your new audience members should be seen in your Audience list with the desired tags and access applied to them from the first step of the configuration process. If you run into any errors, check out this article.
NOTE: "Importing" a list of existing audience members will UPDATE those people with any new Audience Tags or Hub Access you wish to provide them. To accomplish this without removing any existing information for these audience members, choose the hub access and tags you wish to grant in the first part of Step 3 and then only choose to import the "Email" field in the second part.