
Understand the controls and recording process for the Searchie Extension
🧰 What You Will Need
To have installed the Chrome ExtensionStep 1 - Log into your Searchie account
Log into your Searchie account and open your Apps tab.
From your list of applications, click Record to launch (or install) the Searchie Chrome Extension.
Step 2 - Understanding the recording settings
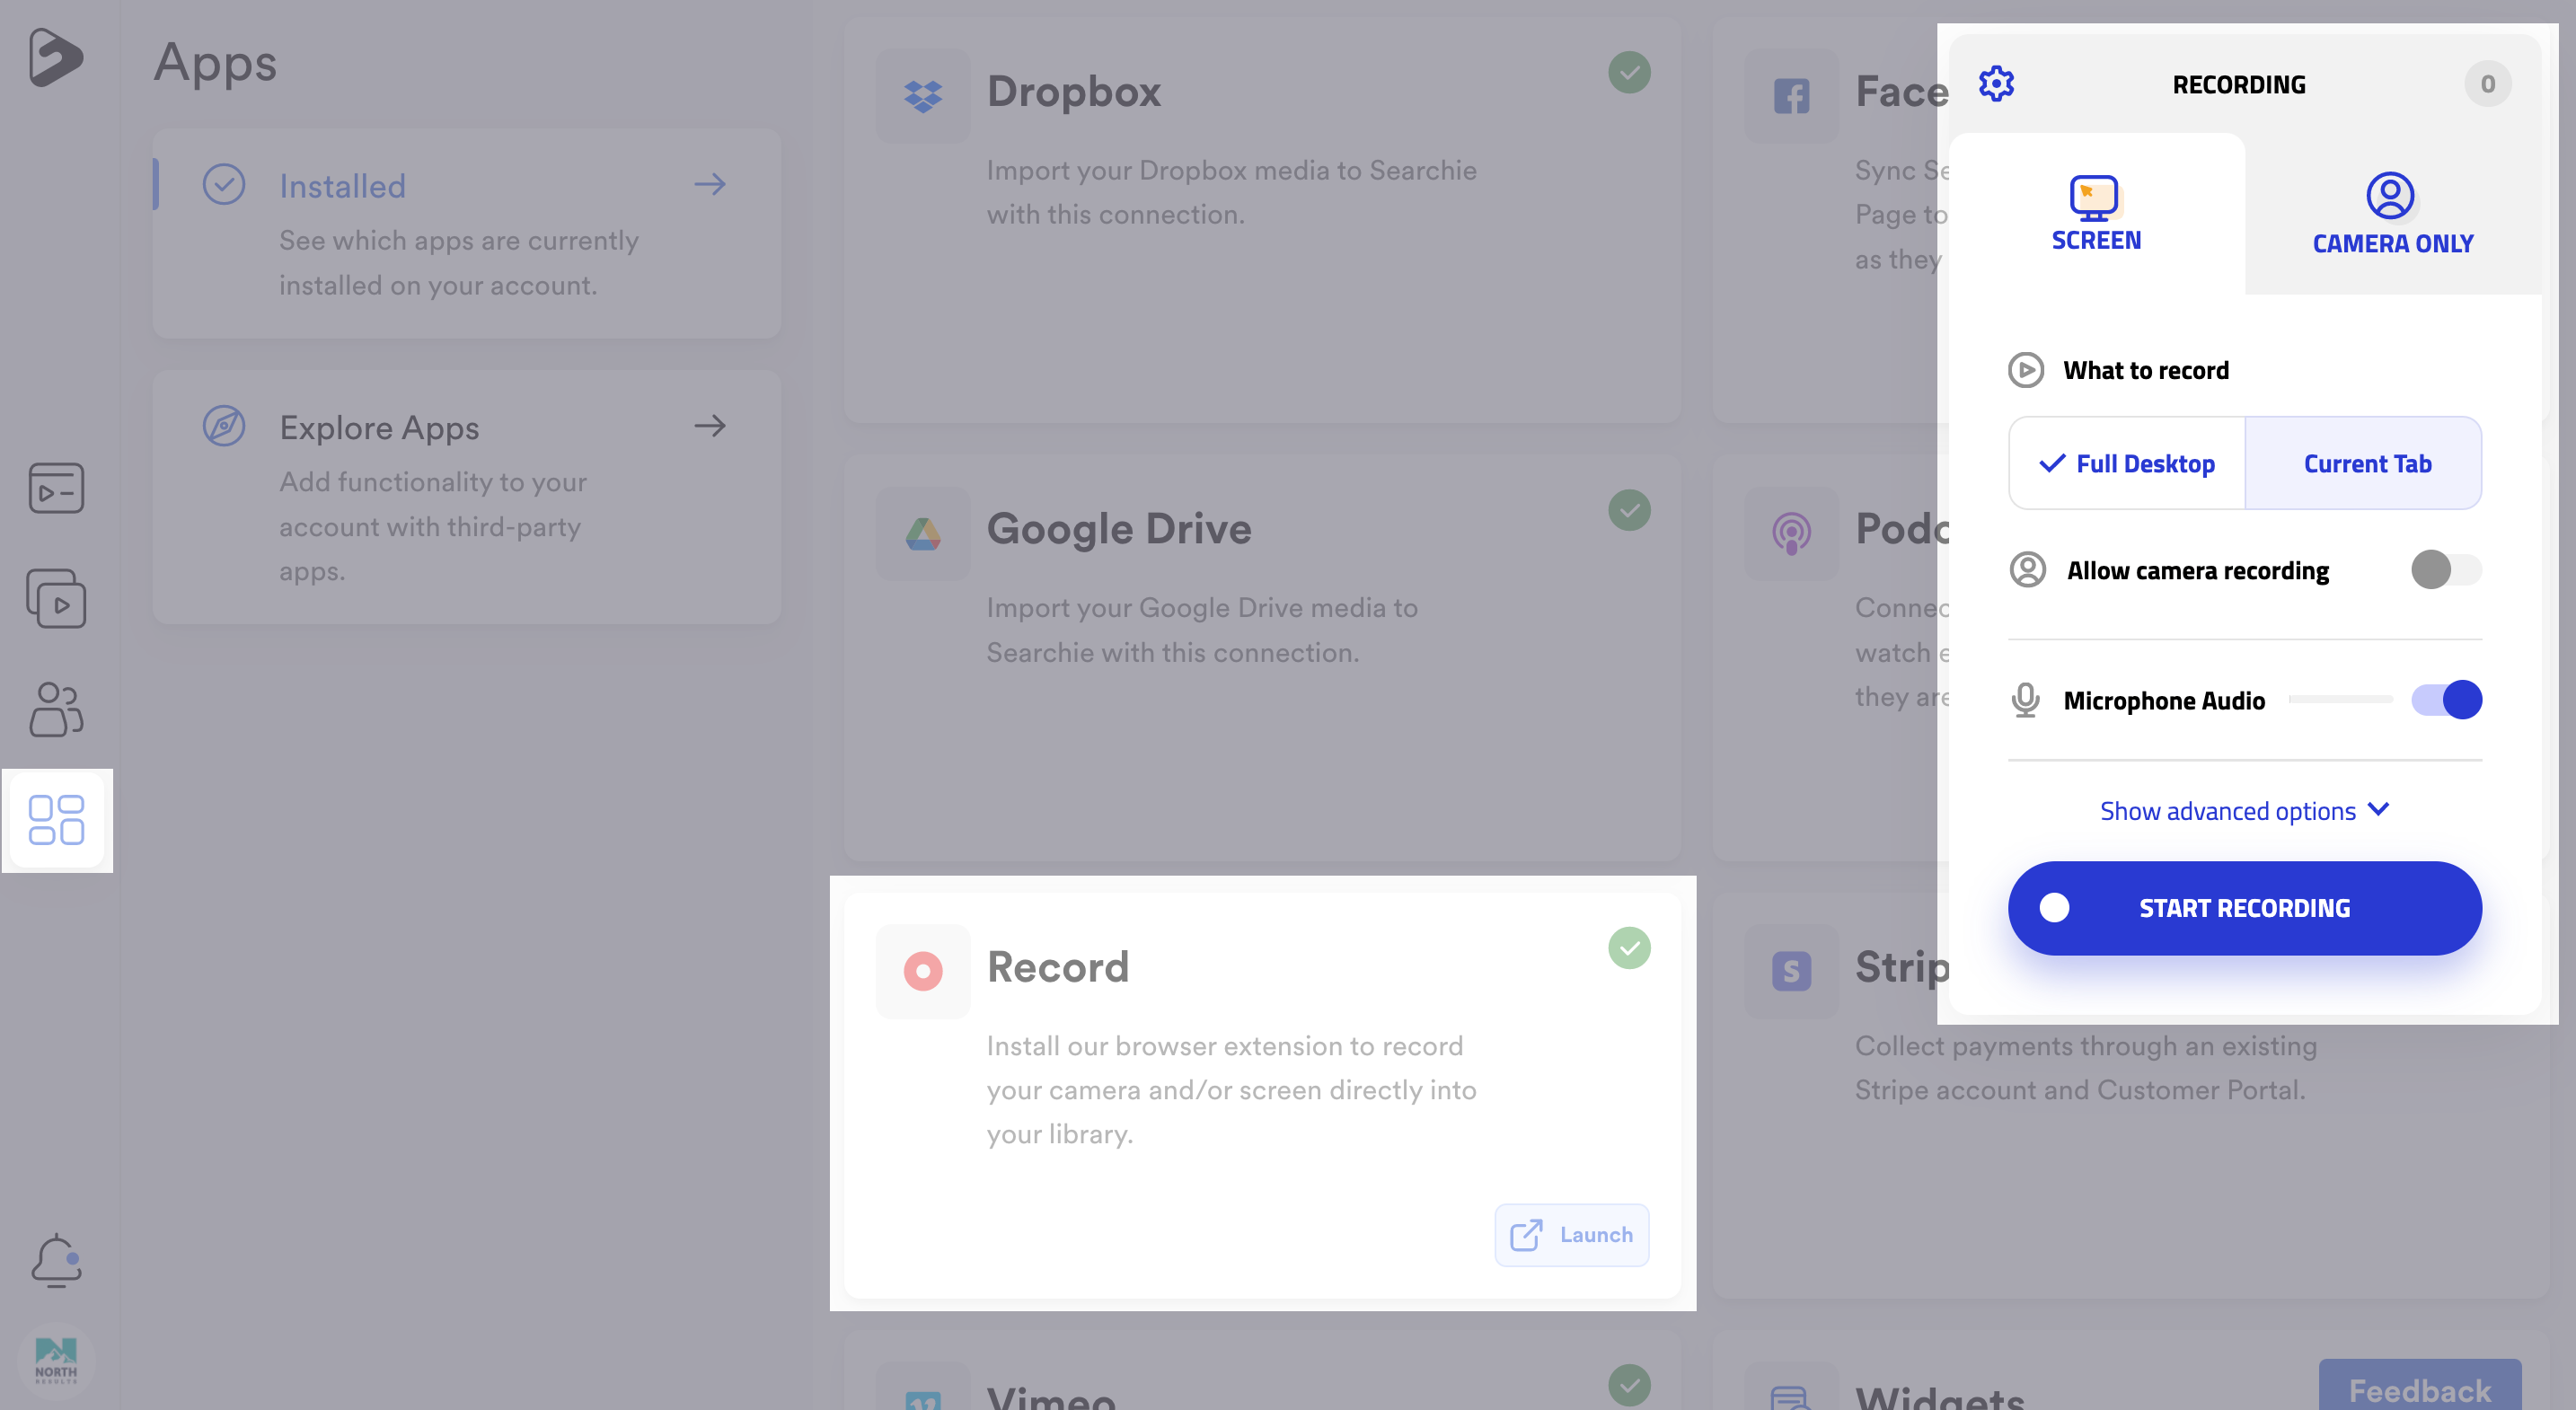
From the first screenshot in Step 1, click Show advanced options to view all of the settings for you to observe and confirm before recording your screen. The Extension interface will be broken down below exhaustively.
Screen - This tab at the top of the dropdown will give you the option to record your computer screen and camera at the same time. It is the most popular option for using the Extension
Camera Only - This tab at the top of the dropdown will record a "talking head" video of you using only the camera.
What to record - Full Desktop - Record your entire desktop, including applications outside of Chrome if you navigate to them during the recording.
What to record - Current Tab - Keep the recording of your screen locked on the current tab you're viewing.
Allow camera recording - Choose to record your camera or not, be sure to choose your camera sizing and location by dragging the camera recording around your screen and selecting the desired size.
Camera Source - This is the dropdown that appears if the camera recording is allowed to let you choose which device to use to capture your face during the recording.
Microphone Audio - Turn on/off the capturing of audio through your microphone.
Microphone Source - Change the device that the extension uses to capture audio for the recording.
Control Menu - Toggles on and off the display for the control menu at the bottom-right corner of the Chrome window.
Countdown Timer - Toggles whether you want a countdown timer of 3 seconds before the recording starts.
Show Elapsed Time - Toggle a timer that runs during your recording to give you an idea of how long you're making each recording.
Annotation Tool - Check out our guide on annotating your recordings.
Start Recording - Starts your recording using the settings you've configured above.
To start your screen recording, click Start Recording in the dropdown or the record button in the Control Menu.
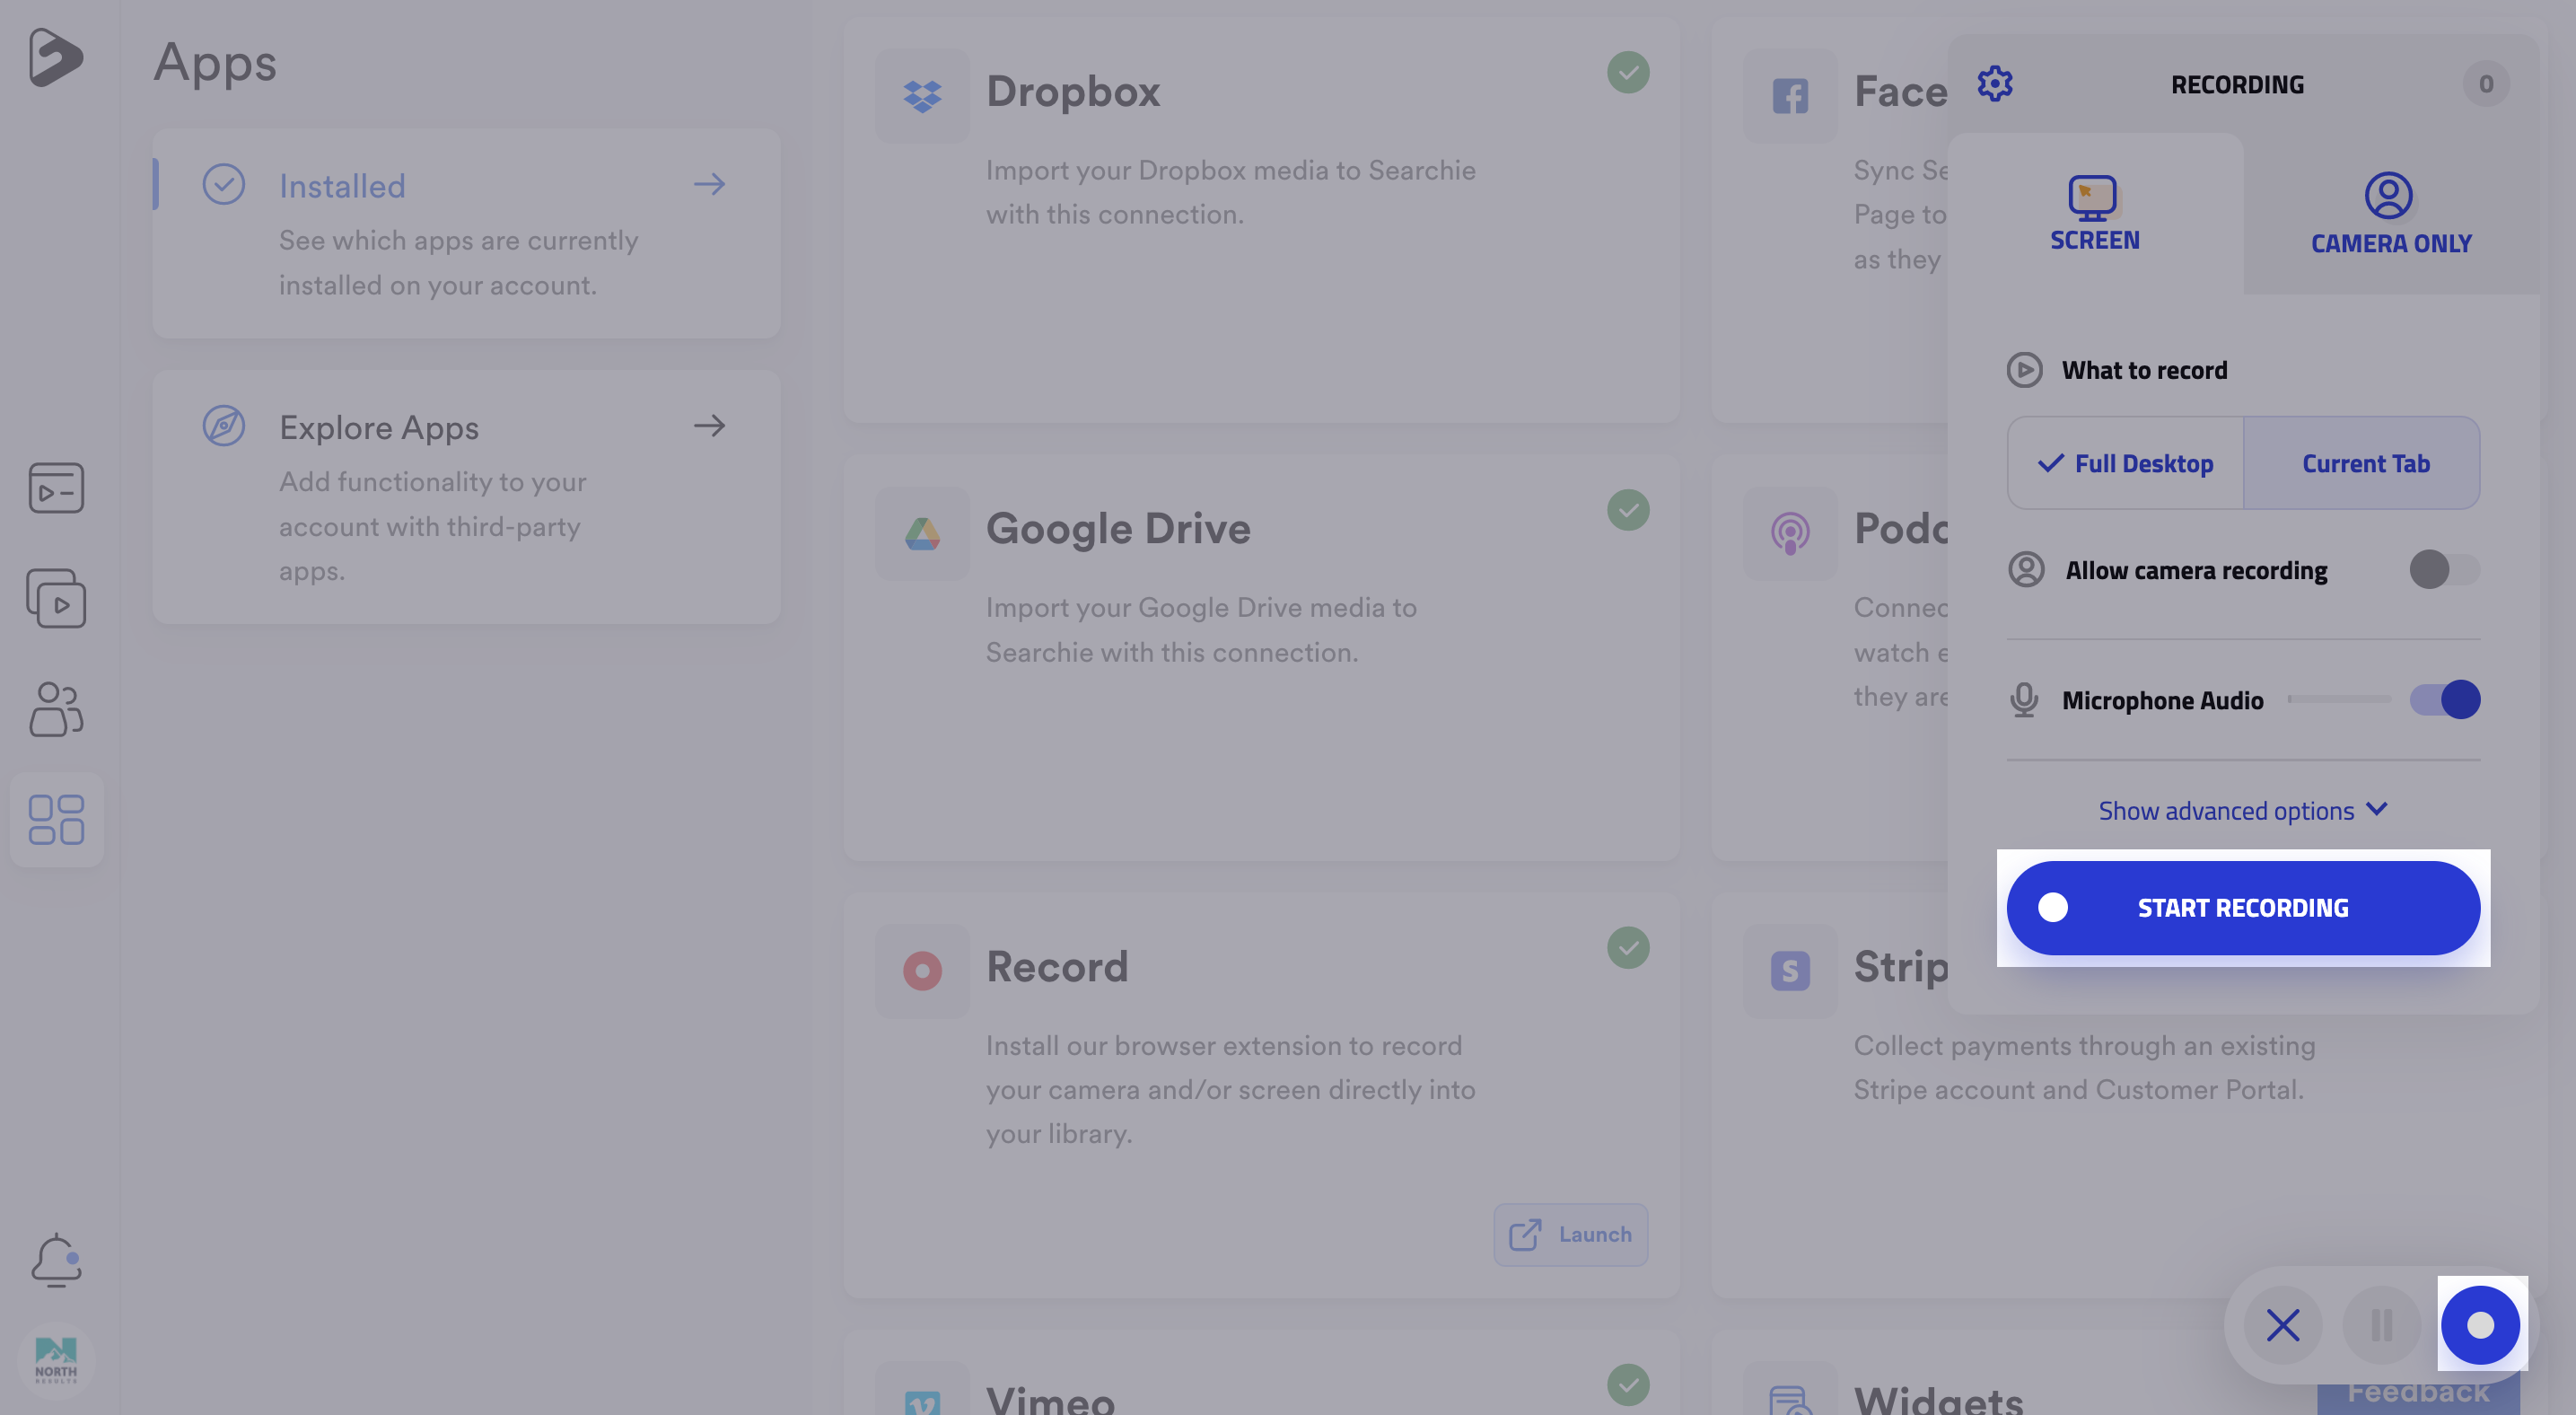
Step 4 - Use the Control Menu
Once the recording has started, use the controls in the bottom-left to Cancel, Pause, or Finish your recording, as well as to annotate your recording.
X button - This will cancel the recording and the uploading of the file.
Pause/Play button - Pause your recording to move to a different page or view and resume the recording.
Record/Stop button - Start and complete your recording with this highlighted button on the right of the Control Menu.
Step 4 (Viewing your Video in Searchie)
Once you're done recording you should see these notifications appear in the top right hand corner of your screen.

Next, a new tab will be opened in your browser that contains the video you just recorded. You can change the name of the recording and copy a shareable link right on this screen!
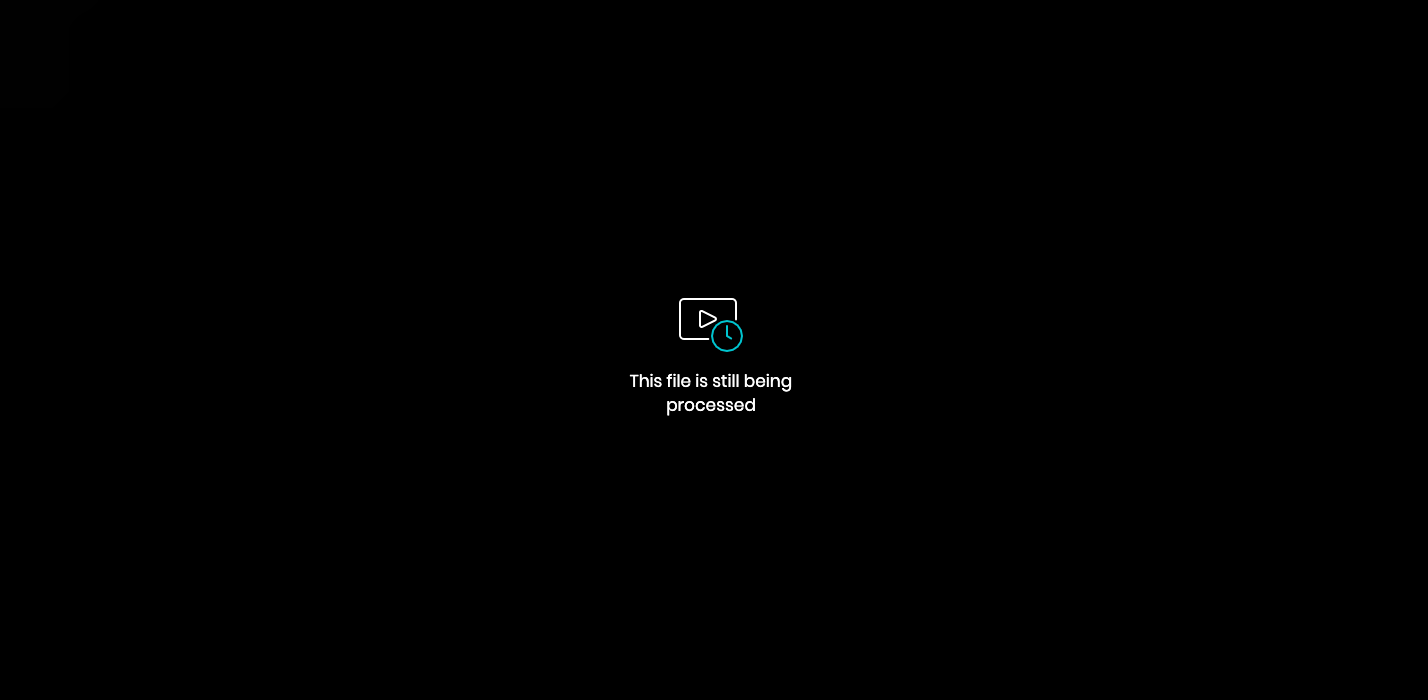
If you check back into your Searchie account, you will see the recording processing. It can still be shared with your audience, but until it's finished processing it will not have a transcription or captions associated with it.
📚 Up Next
-
Build a Playlist with your Extension recordings
-
Embed your recording on your site
-
Add a thumbnail to your recording