
Edit your media transcriptions and captions with this tool to improve the accessibility of your content
🧰 What You Will Need
- Some uploaded media
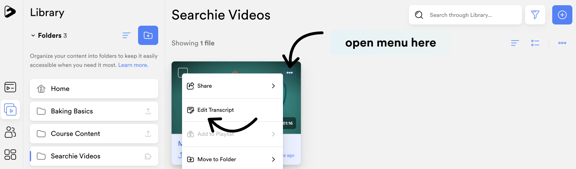
Step 1 - Open your Library
Open your Library to find the media file with the transcript you want to edit.
From here, you can access the editor in one of two ways.
The first way is to open the File Manager for the file you'd like to edit and click on Edit Transcript in the menu.
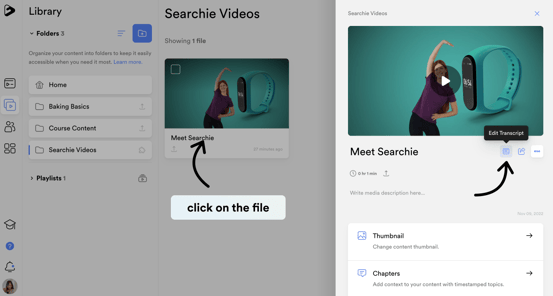
The second way to access the Transcript Editor is by clicking on your file and clicking the Edit Transcript button.
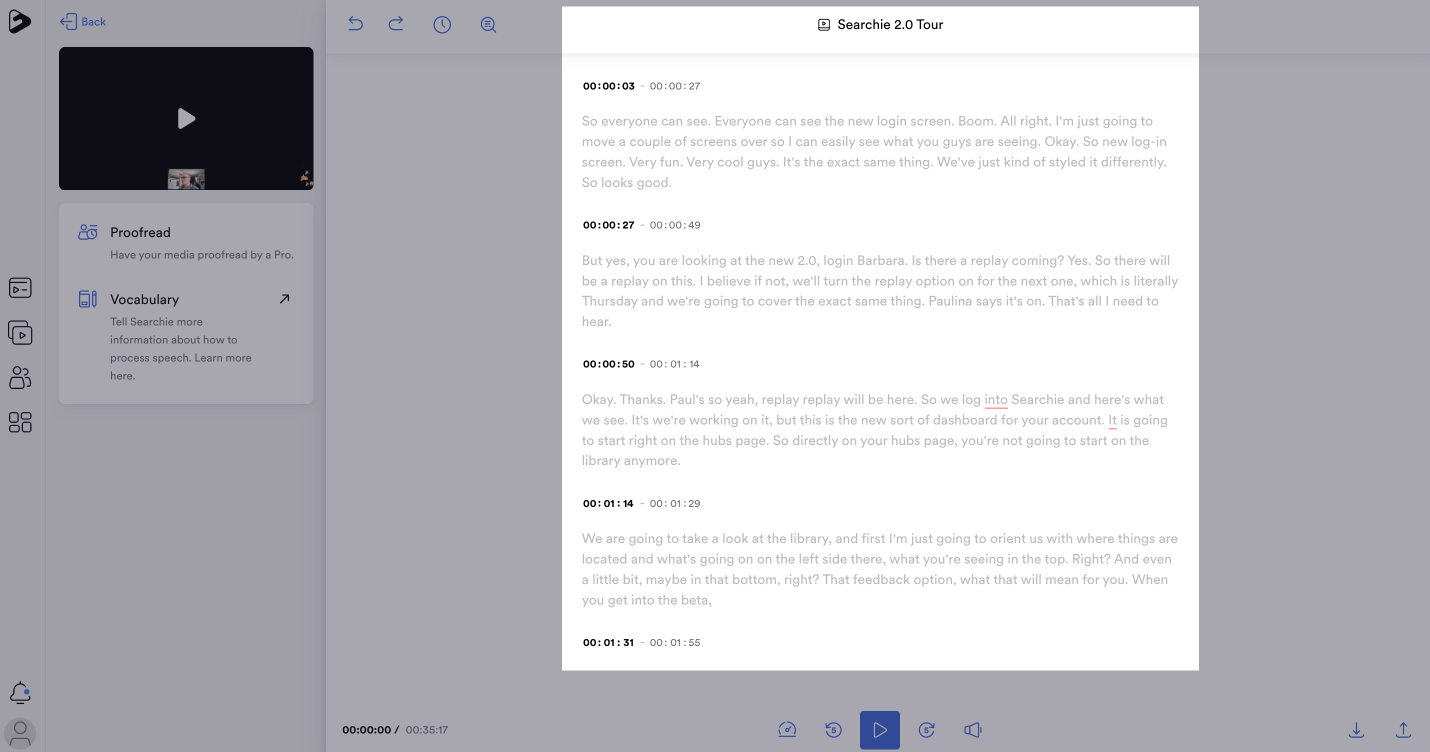
Step 2 - Welcome to the Editor
Once inside the Editor, you will be able to take a variety of actions to clean up the automatically generated transcription. When you want to make a change, simply click into the text and start typing. You will see the changes take effect immediately.
We'll explore the rest of the options below, but feel free to look around on your own as well.
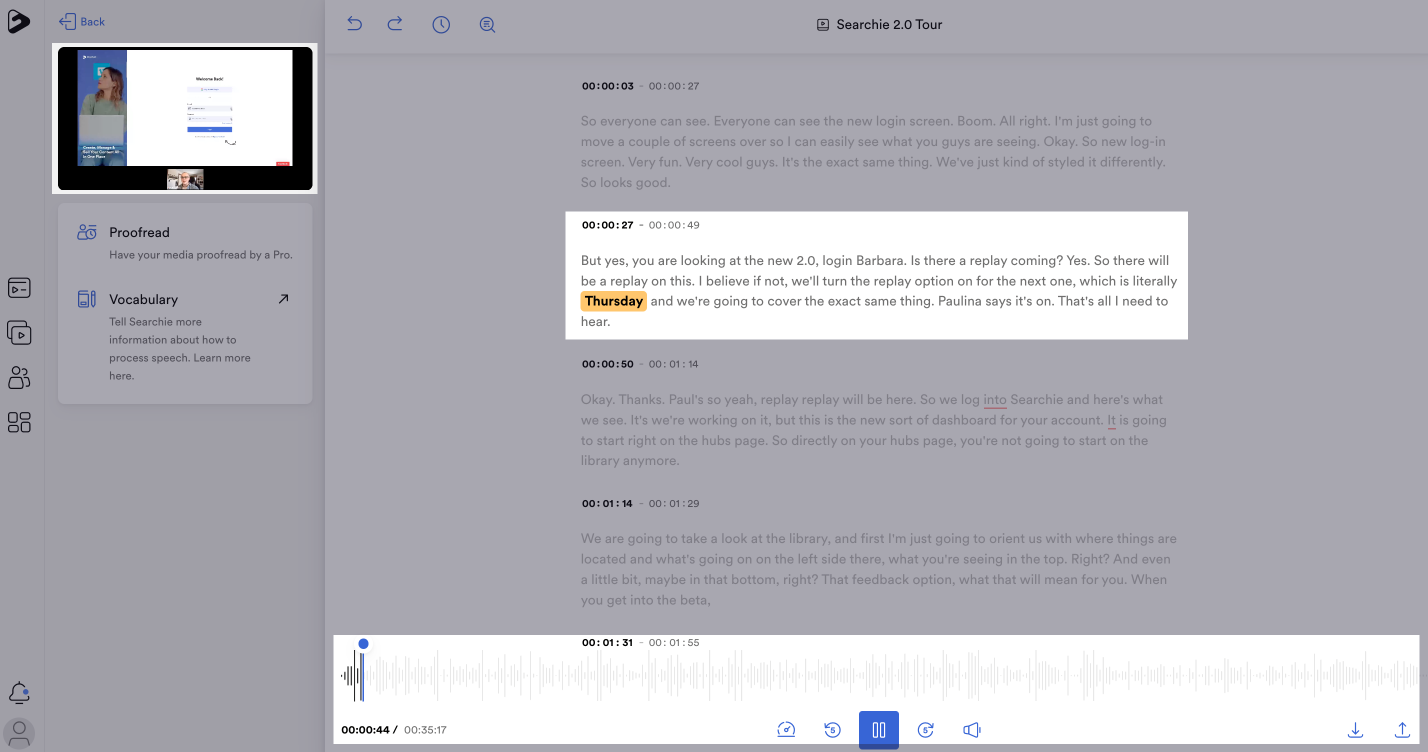
Step 3 - Playing your media
You can click the Play/Pause button in the bottom toolbar or click the video on the left side of the screen to start playing the file you are editing. The transcription will highlight the words as the media plays, helping you follow along with the audio.
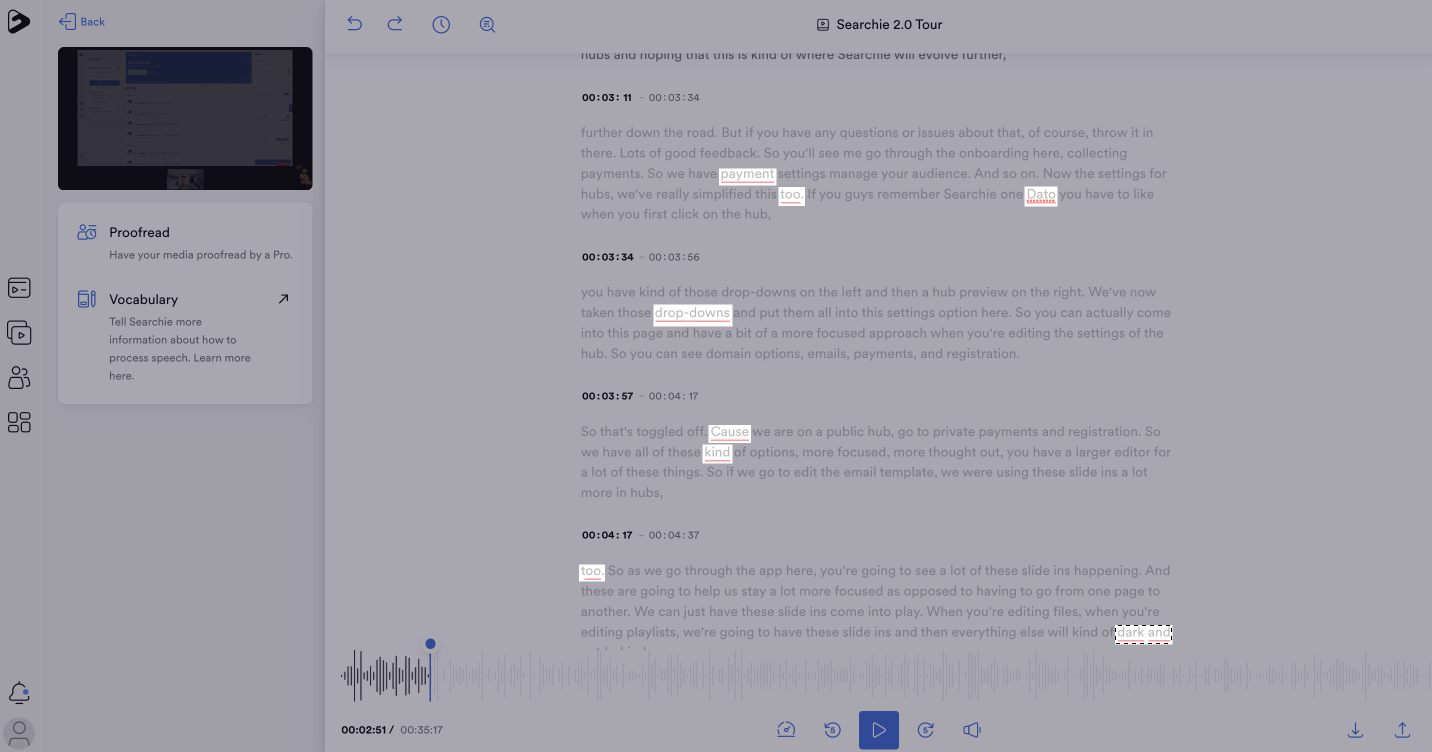
Step 4 - Low confidence words
If you notice any red-coloured words in your transcription, these are the ones you are going to want to check against the audio first. These are words with low confidence scores, and the transcription AI is suggesting it may have misheard them.
Step 5 - Find & Replace words in bulk
Use the Find & Replace icon shown below to search for a word that has been repeatedly misspelled and replace instances of it with the correct word. You may want to consider adding this word to your Custom Vocabulary to avoid the need for these replacements in the future.

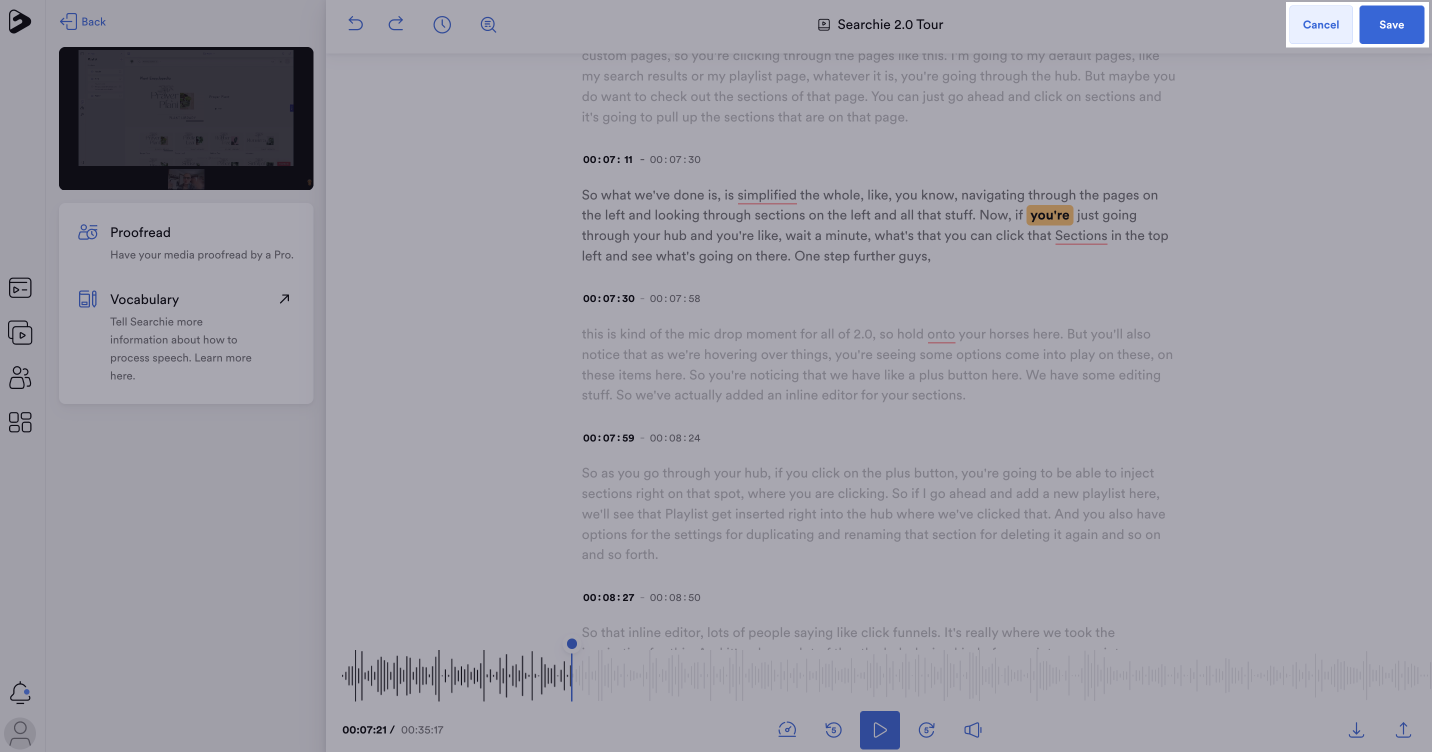
Step 6 - Save your changes
Be sure to click Save on the top-right corner to save any changes made to your transcription before exiting. Don't worry if you forget, you'll be prompted before exiting the page.
Step 7 - Other options to explore
Here is a quick breakdown of the other options you will want to explore in the Editor, from left to right and top to bottom in the screenshot below.
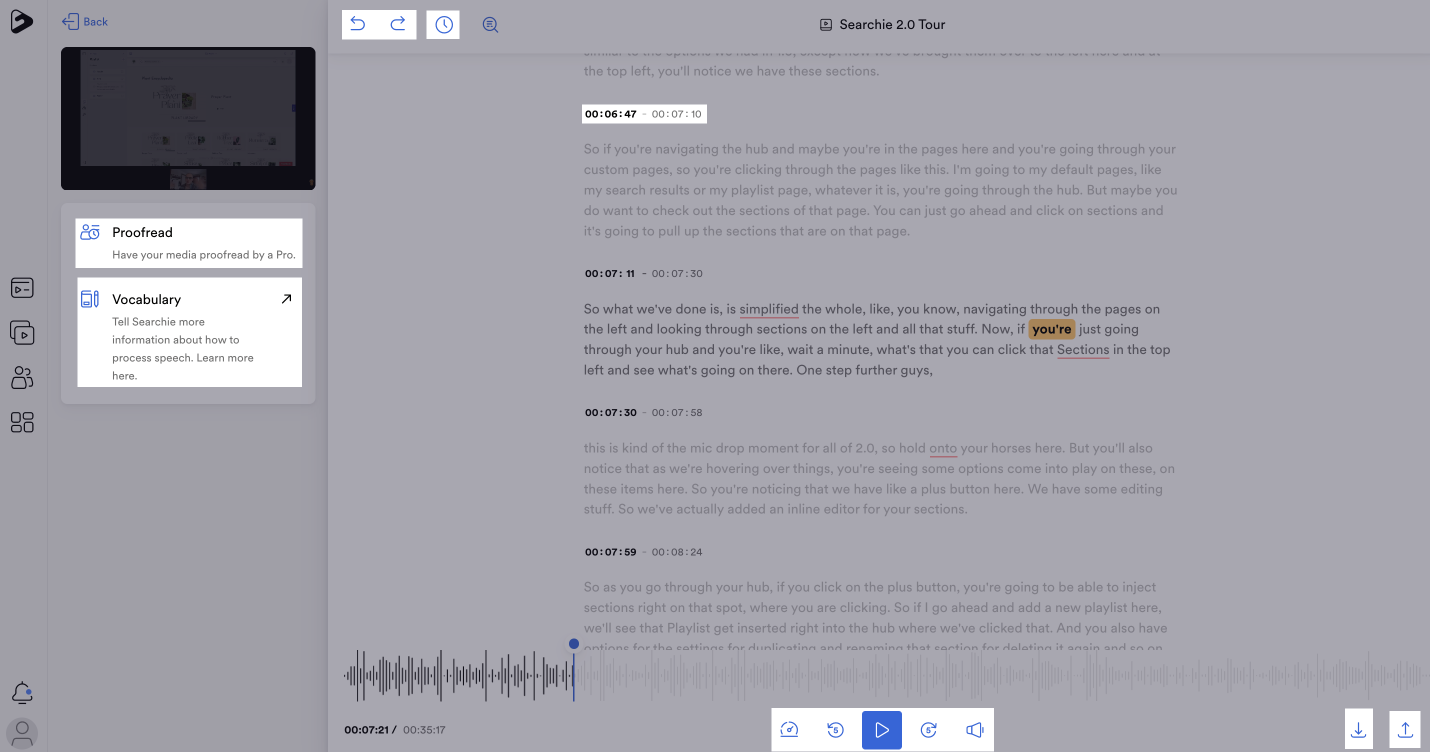
Undo and Redo - These allow you to undo or redo any changes you've made to your transcription.
Version History - Revert to an older version of your transcription at any time.
Timestamp editing - Edit the beginning and ending timestamps for a paragraph to adjust the timing of the captions. Listen for the first or last word of a paragraph and note the timestamp the word is spoken to make changes to the timestamps accurately.
Proofread your transcriptions - Have your transcriptions proofread by a professional transcriptionist for a discount.
Custom Vocabulary - Click the dictionary icon in the top left to access the Custom Vocabulary in your Transcriptions Settings.
Playback Speed - Adjust your playback speed, play/pause, rewind and fast-forward, and volume.
Download transcript - Download the TXT, CSV, and/or SRT file for the file.
Replace with an SRT file - Replace the existing transcription entirely with an SRT file you have generated elsewhere.
📚 Up Next
1. Process and transcribe media files
2. Replace an existing transcription with an SRT file