
Add custom code snippets to your Hub using your Container ID and Custom HTML Tags
🧰 What You Will Need
-
A Searchie Pro Plan
-
A third-party app with a code snippet to install
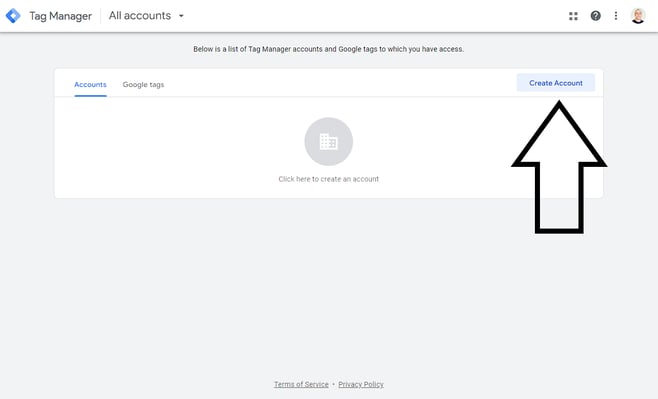
Step 1 - Set up your Googe Tag Manager account
Inside of Google Tag Manager, click Create Account and fill in the details for your business.
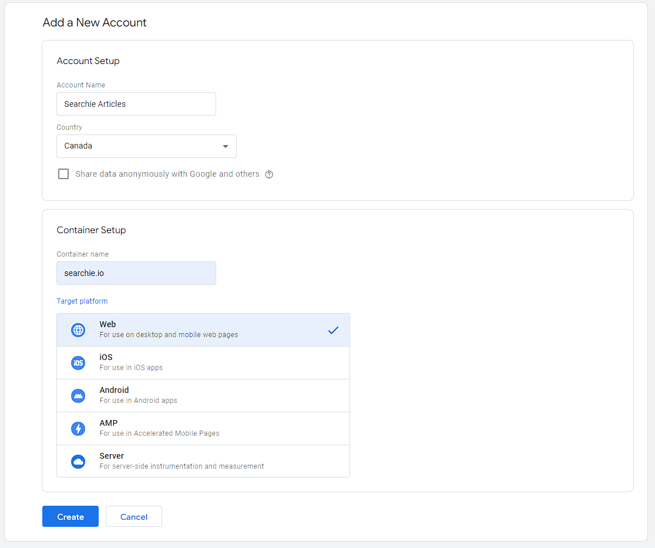
The name of the account and container will not affect the functionality of the code snippet you want to install. You will need to select Web for the Target Platform, though. Click Create when you're done and agree to Google's Terms of Service that pop up.
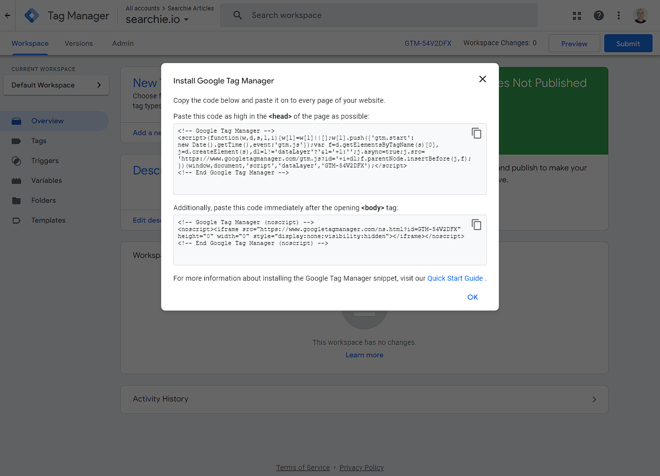
Right away, you may be greeted with some daunting code... you can close this window and ignore it for now.
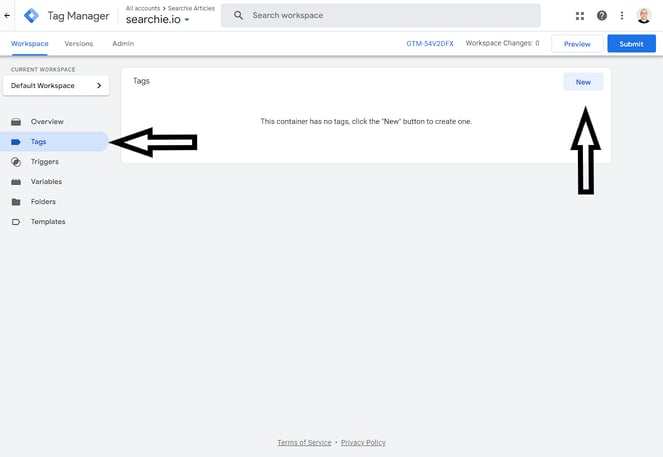
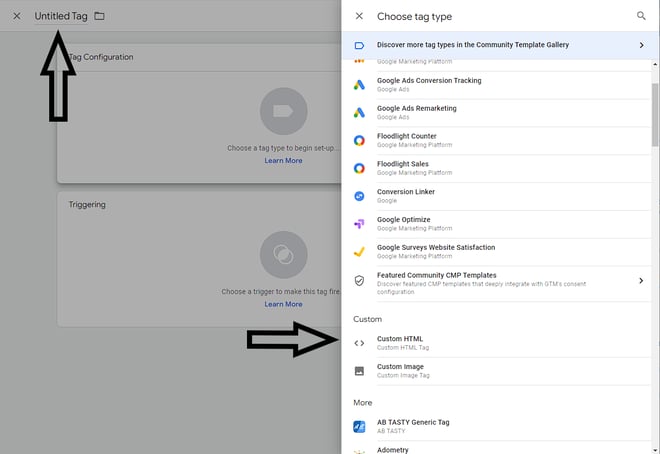
Step 2 - Create a new Custom HTML Tag and add your code snippet
Click Tags in the menu on the left and then click New. Click on the Tag Configuration box and then choose Custom HTML as the tag type. You can also name the tag in this step.
For the purposes of this example, we are going to use a fairly simple third-party integration called Popupsmart that is free to get started with. Be sure to reach out to help@searchie.io if you have any requests for other snippet examples, though. There is a good chance we could use your use case as an example in another help article.
Now that we have our Custom HTML tag ready, all we need to do is take the code snippet provided from Popupsmart and add it into the HTML field of the tag. Most third-parties will have documentation on how to hook up their integration with Google Tag Manager, so be sure to check out their documentation if you get stuck at this step.

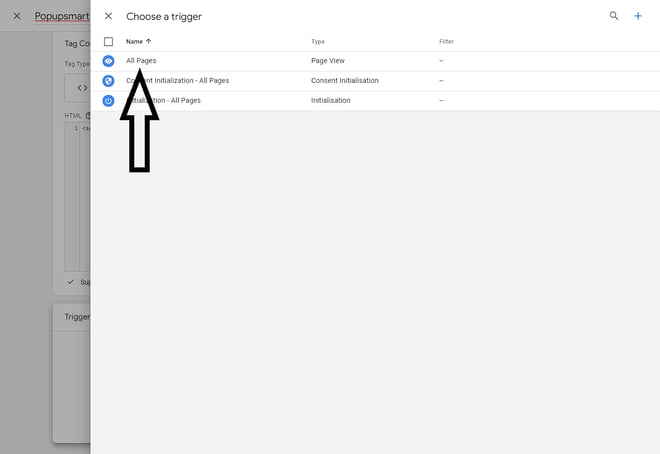
Finally, add a Triggering condition to this tag to determine when the code should run on your Hub. These triggers can be anytime a page is loaded in the Hub or only when a specific page is reached. Check out this article for a full breakdown of triggers.
The best way to test your trigger and tag are working before fine-tuning is to simply choose the "All Pages" default trigger that Google provides.
Once you have your Tag Configuration and Trigger fields filled in, click Save to create the tag. Now you will need to click Submit to confirm this update to your Google Tag Manager Container. On the slide-in window that appears, you can enter any details you would like about this version of your container. Think of this as a mini journal built into your Google Tag Manager account.
Once you are satisfied with your journal entry, click Publish.


Head back to the main workspace page of your account and get ready for the fun part.
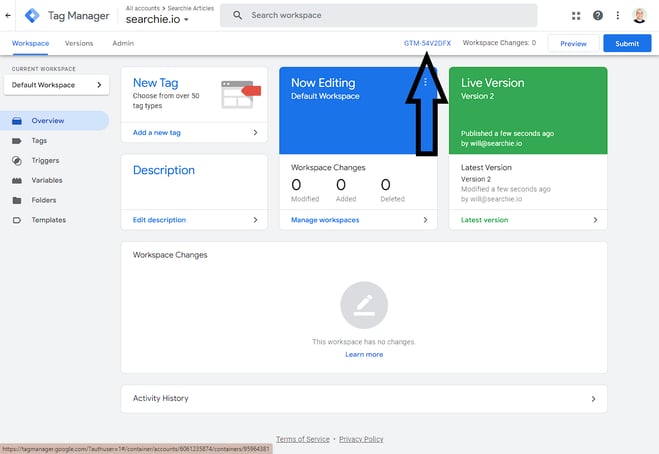
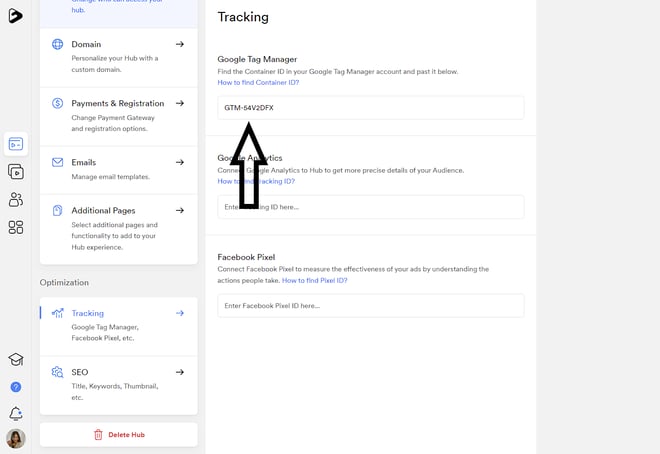
Step 3 - Add your GTM Container ID to your Searchie Hub
The last step of this process is to take the shiny blue ID you see at the top of your workspace and add it to the tracking settings of your Searchie Hub.
Step 4 - Test the Trigger
In this example, we set our code to trigger on every page. That means that any time a user goes to load a page in my Hub, whatever is set up to fire off with that code is going to be triggered.
We can easily test this by previewing the Hub and seeing the results. Below you can see the Black Friday pop up that I created on Popupsmart appearing on the home page of my Hub after the site has finished loading,

📚 Up Next
-
Add your other Tracking Settings
-
Add Custom CSS to your Hub to customize it even further
-
Take your Hub to the next level with customized labels for your content