
Show your audience videos and ask your audience questions as they onboard into your Hub
🧰 What You Will Need
-
A Searchie Grow plan or higher
-
A Hub set to private
What can I use this for?
One of the easiest ways to personalize your audience's learning experience is to learn more about their needs from the get-go.
Using custom Audience Attributes, you can add questions that your audience will be asked to answer as they go through your Hub's onboarding process.
In this article, we'll walk you through how to set up your Hub onboarding process to include questions that you create for your audience to answer.
You can also use this process to add a video, such as welcome or site tour video, into your onboarding page(s).
Step 1 - Open Hub Editor
From the Hubs tab inside your account, click on the Customize 🛠 icon to open your Hub Editor.
Step 2 - Populate Audience Attributes
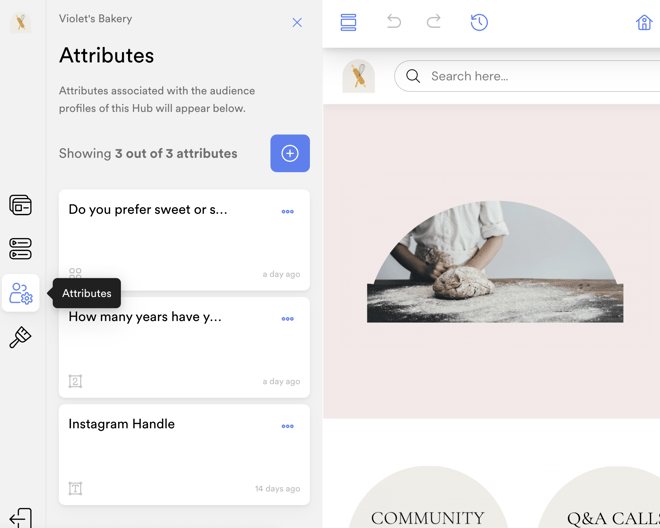
Once inside your Hub Editor, click to open the Attributes tab.
Create or import one or more Audience Attributes you'd like to connect to your Hub.
As you add your Attributes to your Hub, you can also control whether your audience can edit each Attribute’s answer after the initial onboarding.
Step 3 - Open the Onboarding Page
Now that you've connected your Audience Attributes to your Hub, you can organize how these Attributes will appear as part of your Hub's onboarding process.
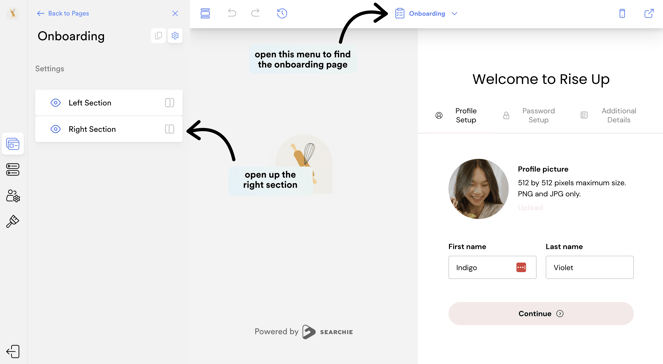
Inside your Hub Editor, select Onboarding to edit your Onboarding page. From here, open the Right Section to add additional steps to your Hub Onboarding process.
Step 4 - Create New Onboarding Steps
Click + Add Step to add a new page into your Hub Onboarding process. You'll have the option to name your Step and customize (or toggle off) this Step's Headline and Description.
Click + Add Element to add a section into this Step. From here, select Input to choose your Audience Attribute.

Use the Label to customize the title of your Attribute.
Use the Description to give your audience more context about this Attribute.
Click ← Back to Step to add more elements into this Step.
OPTIONAL: Step 5 - Add one or more videos
You can also select a Video element to add to your onboarding page if you'd like. 👀
.png?width=658&height=347&name=downloads.intercomcdn.comio5798768498f6f453592b86e6d6f8e5095Frame+3+(2).png)
Step 6 - Save Changes
Once you've added your desired elements to the onboarding page be sure to save your changes and you're good to go! 🚀
Start sharing the Hub with your audience to make use of your new attributes! 🎊